Well, this was definitely the funniest invention of mine this week!
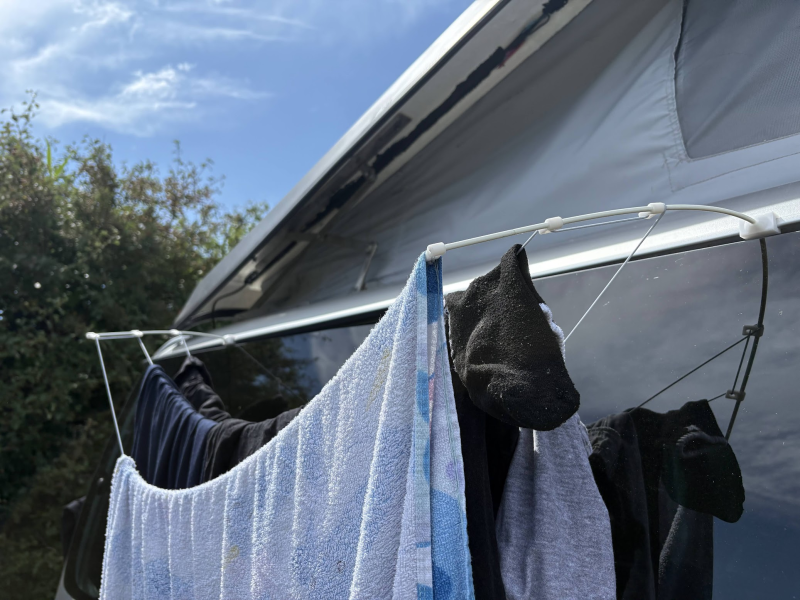
Last week while camping, I tested the first version of my 3D-printed clothesline (above). It worked — but was far too bendy and flexible to be practical.
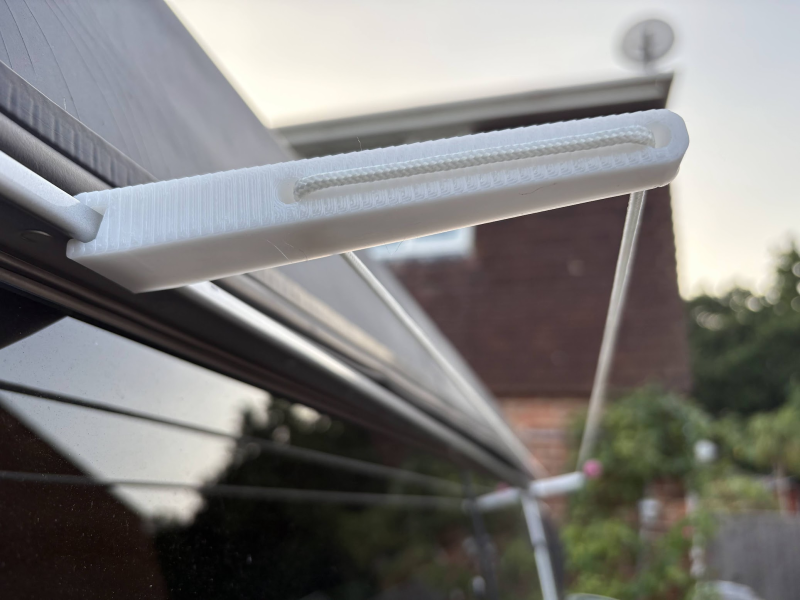
So, I came up with a much simpler and stronger design.
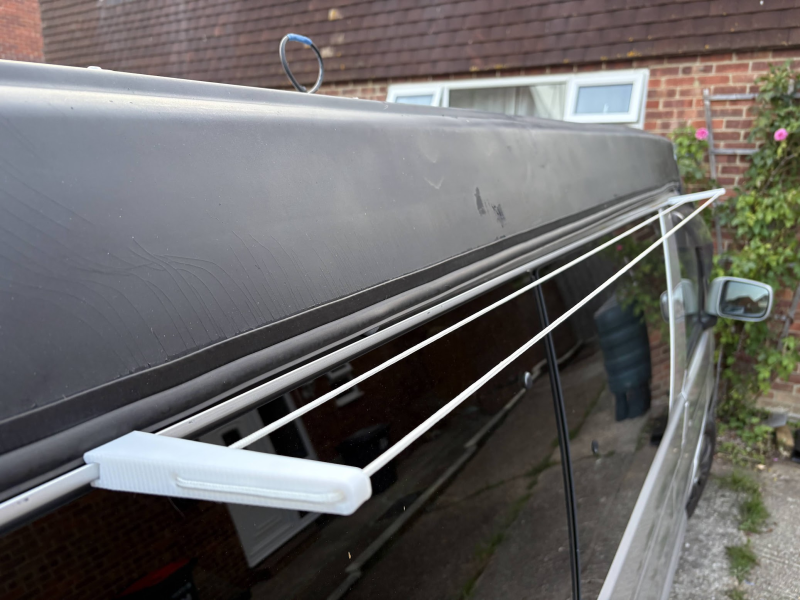
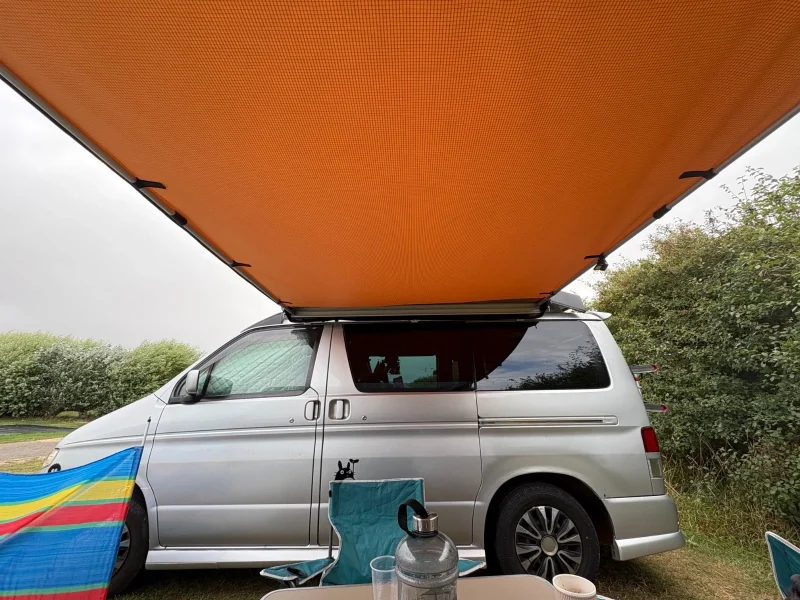
The new design is a single rigid part. Two clotheslines stretch between the arms, and tensioning them is super easy — as shown in the video above. It clips on and off the gutter in seconds.
If you’d like to grab one, just search for “Bongo Clothesline” on eBay UK. 😊
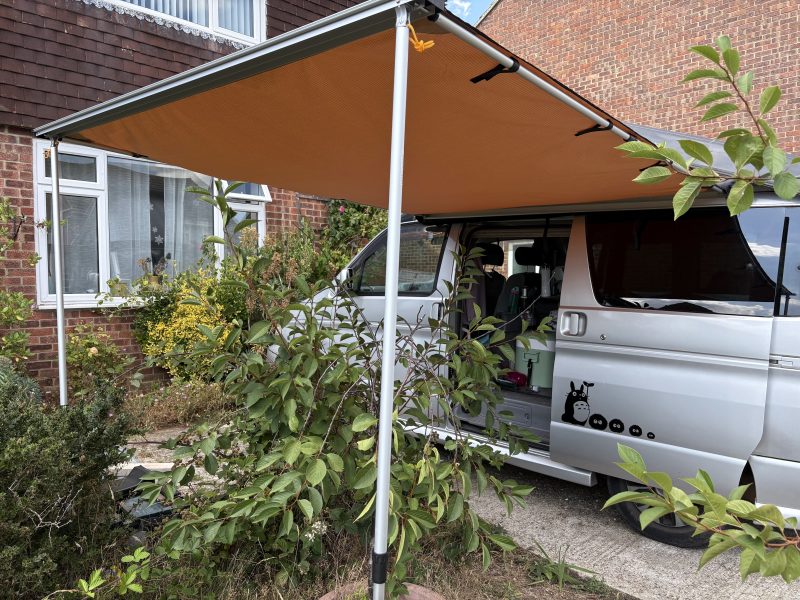
However, when I started looking for mounting brackets, I only found ones that cost more than the awning itself and were designed to sit directly against the door pillars. The awning’s rail is 195 cm long, so if mounted directly, part of it would end up above the rear window — not ideal.
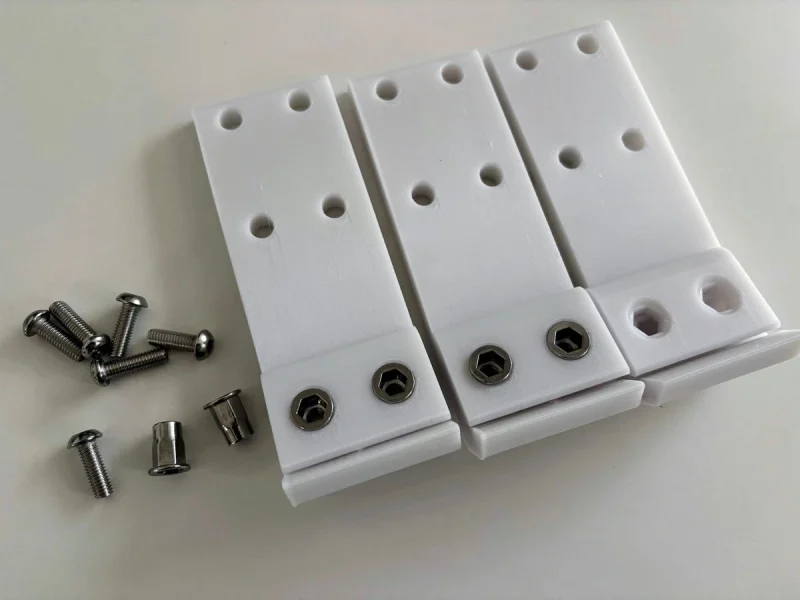
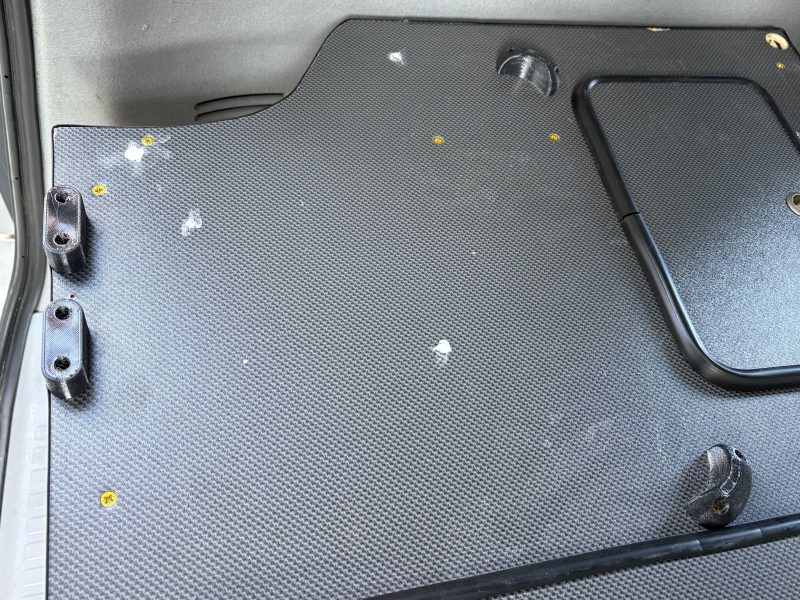
So, I designed my own bracket system that attaches directly to the rain gutter and distributes the weight evenly across three 5 cm wide printed parts.
I went through over ten iterations, testing different shapes and materials. My first choice was carbon fibre-reinforced nylon — it’s strong and rigid, but too harsh on the van’s painted surface. Worse, it’s brittle under impact — not ideal for supporting a roof-mounted awning.
Eventually, I settled on PETG, which offers excellent outdoor durability and flexes slightly under pressure rather than cracking. Much more suitable for this application.
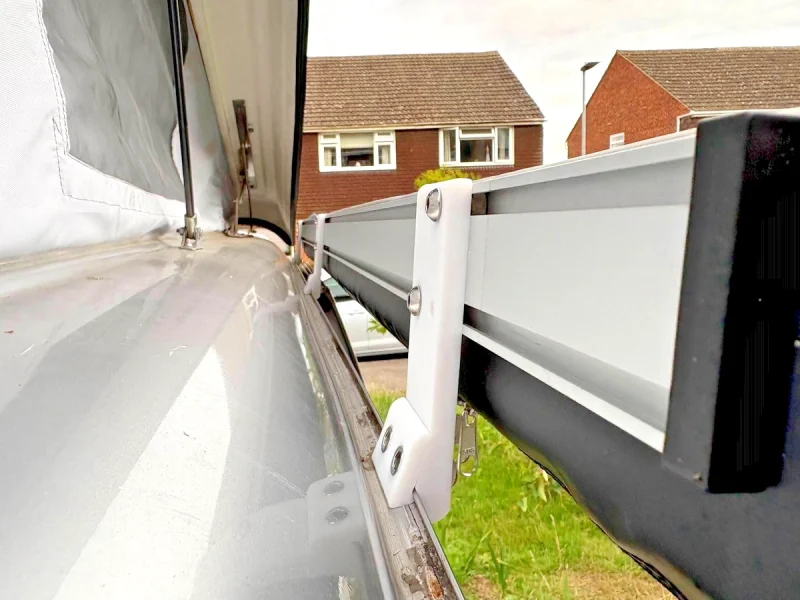
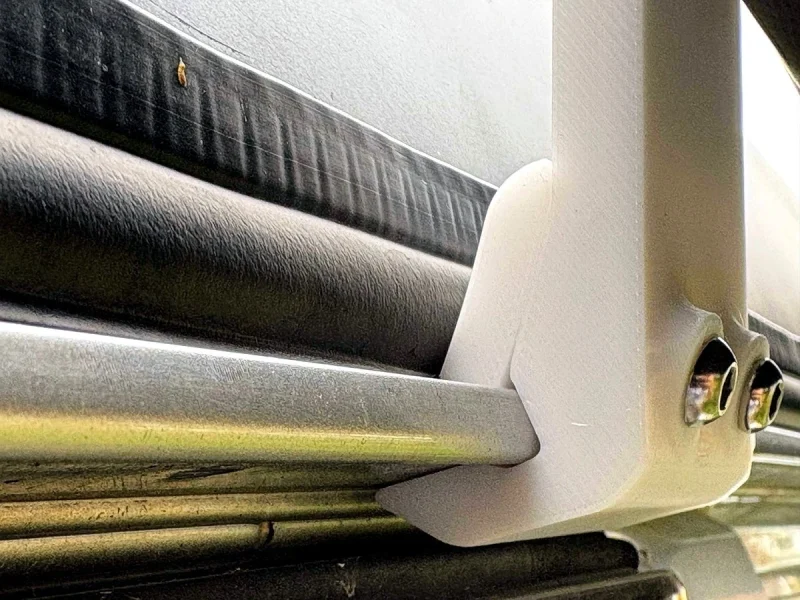
The brackets grip the Bongo’s rain gutter securely and sit flush against the side. Thanks to their flat rear surface, they don’t interfere with aftermarket pop-top roof seals, allowing the roof to close normally.
Since the bracket only drops about 10 mm below the gutter line, it doesn’t obstruct the sliding door or the front passenger door. You can mount the awning anywhere along the vehicle.
We tested the setup on a 600-mile, 5-day trip — including strong wind and heavy rain — with zero issues. Everything held up perfectly.
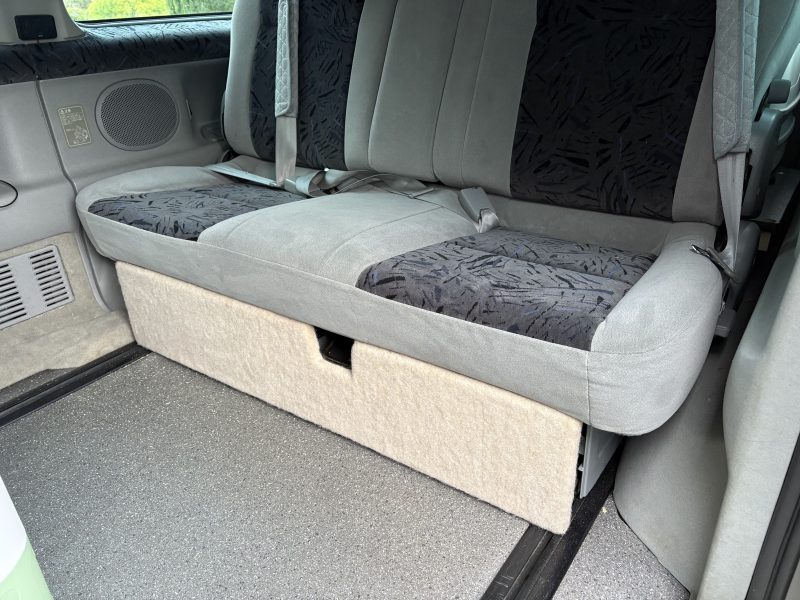
I built a 60 cm deep bed extension frame to complete the sleeping platform when the seat is folded flat. I reused the front panel from the original kitchen unit, which was left over from the previous conversion. This gives it a neat look — and more importantly, allows access to storage under the bed via the cabinet doors if needed.
The frame is secured to the seat rails using T-bolts, so it can be removed easily when required. It’s very lightweight and practical. There’s enough space underneath to store two under-bed containers and a folding table.
I also designed and 3D-printed some elastic mountings to safely transport the Porta Potti 345 toilet in the van. They hold it firmly in place — and although it’s a tight fit, it can even be used inside the van when absolutely necessary.
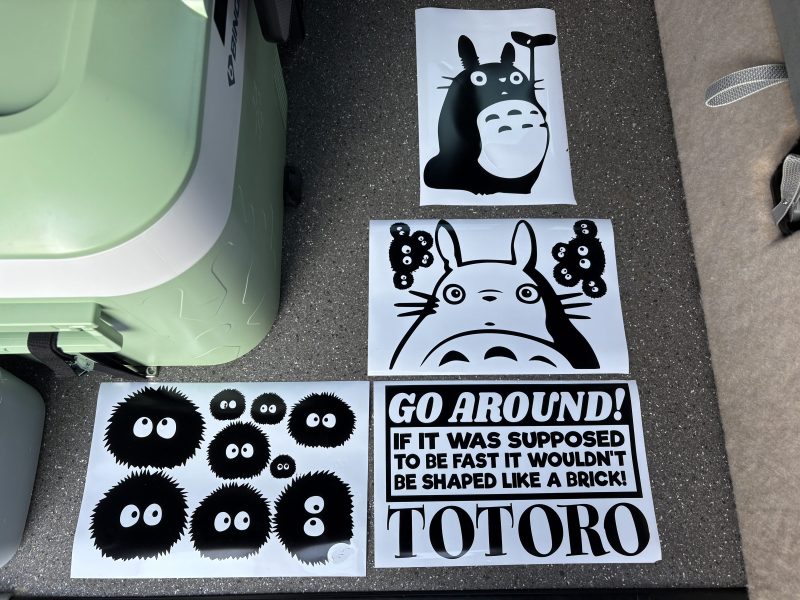
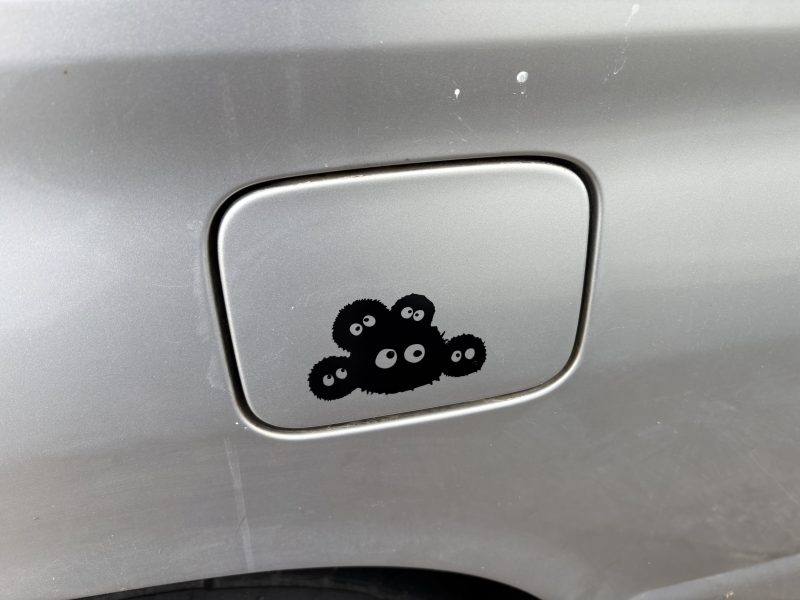
That means we can now insure it and finally start using it properly. After some thought, we’ve decided on a name: Totoro.
Just like the beloved character from Studio Ghibli, our van is grey, comes from Japan, and will be taking us on all kinds of little (and maybe big) adventures.
Here’s to many miles of memories with Totoro! 🚐✨
Evdeki eski stencil router ile bu stickerlari tasarlayip kestim.
Thanks to the Vantastic Ideas YouTube channel, I was inspired to build this underseat drawer for our Bongo — and after a few trips, I can confidently say it’s the most useful and practical mod I’ve done so far. Here is the Vantastic Ideas youtube channel https://www.youtube.com/watch?v=Qy871J2cICg
I removed the factory underseat plastic trim and installed a pair of 350 mm heavy-duty drawer runners directly into the trim screw mounting points, using longer screws. They lined up perfectly and fit snugly. Runner link (UK): https://amzn.eu/d/h4M8AVP
The runners are strong enough to support a fully loaded drawer even when fully extended — really impressed with their performance so far.
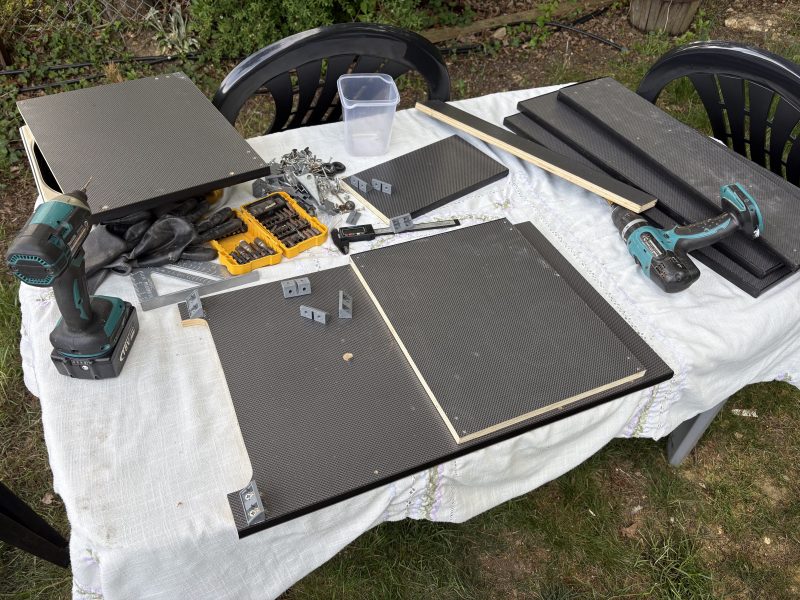
I made the drawer using leftover panels from the kitchen conversion and a 4 mm plywood sheet from B&Q. It came together nicely and feels very sturdy.
The narrow middle section is intentional — it leaves clearance for the seat release handle. That way, plates and gear can’t block it or dislodge the seat from the rails in case of sudden movement. We only keep low-profile, soft items in that middle area.
Finally, I covered the drawer front with 4D stretch carpet to match the van interior. We now keep nearly all kitchen essentials in this drawer — and the kids can grab snacks like crisps by themselves during travel. Super handy!
Note: A locking mechanism is essential. I designed and 3D-printed a small latch that attaches to the seat release handle. When the handle lifts about 1 cm, the drawer is released. Simple and effective.
I wanted the Mazda Bongo’s electric curtains, interior lights, and similar accessories to run from the leisure battery instead of the starter battery. Rather than rewiring everything, I made a simple but effective modification at the fuse box.
Important: When doing any internal wiring in your vehicle, always include a fuse as close as possible to the battery output. This helps protect against cable damage or short circuits if the wire gets pinched or worn.
I installed a 20A fuse at the leisure battery output and ran a cable from there to the fuse box. At the fuse box, I soldered the ends of two cut fuse taps (fuse connector blades) to this cable and inserted them into the bottom legs of the relevant fuse slots. That way, the electric curtains, interior lights, and the cigarette lighter socket are now powered by the leisure battery instead of the main one.
Update: The car stereo was also powered through the cigarette lighter socket. However, I discovered that the aftermarket audio system I installed draws too much current, even when idle. So I reverted the cigarette socket to the starter battery by reinserting the original fuse.
Above: 2002 Mazda Bongo 2.0L standard fuse box layout for reference.
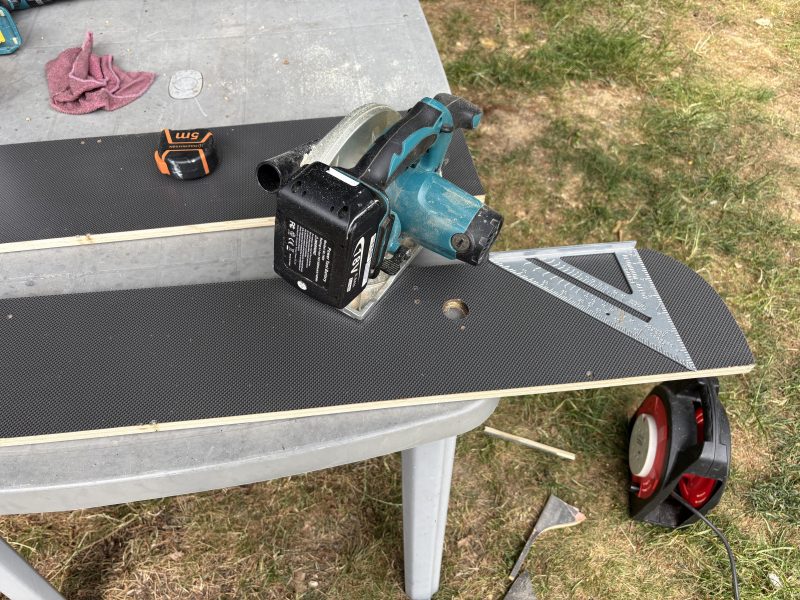
As I mentioned in Kitchen Conversion – Part 1, I realised how valuable the lightweight caravan-grade plywood panels from the original kitchen were. They’re not sold in small sizes — a standard sheet is 2440 x 1220 mm, and shipping can add another £100 or so due to the size. So I decided to reuse every possible piece from the old kitchen.
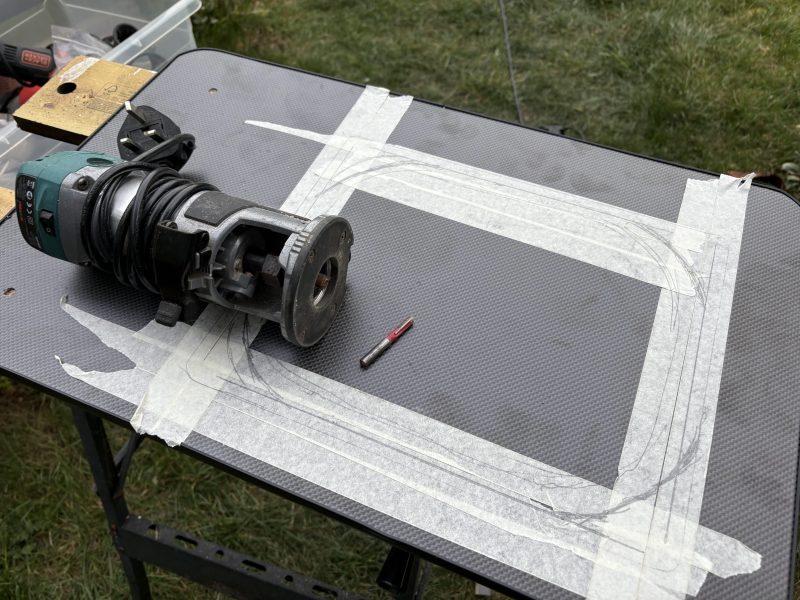
The cabinet door from the previous kitchen is now repurposed as the new kitchen top. I used a router to cut the sink opening.
I quickly built a cabinet — 32 cm wide, 40 cm deep, with two shelves — in about 30 minutes. I reused brackets and screws salvaged from the old kitchen.
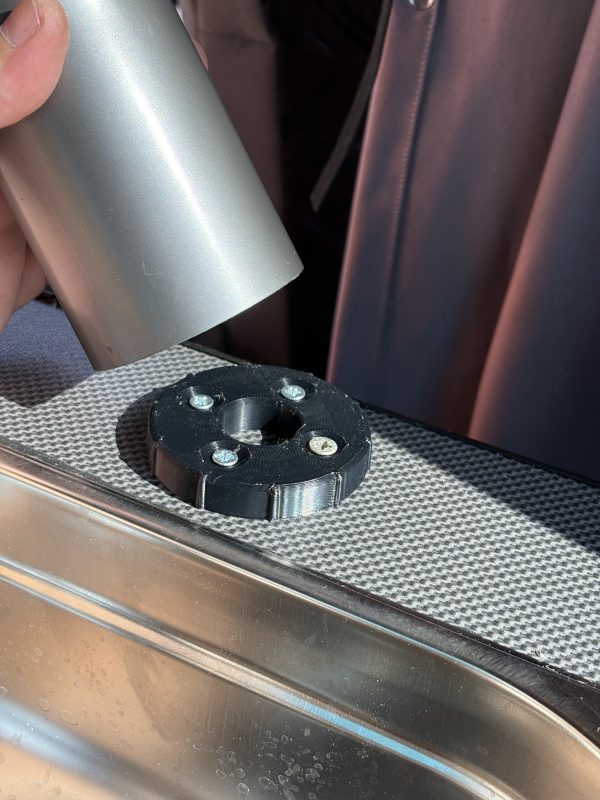
This 3D-printed piece I designed holds the tap in place. It also allows me to remove the electric tap easily when it needs recharging.
Here’s the interior: there’s space under the sink for the stove, and at the bottom, two 10-litre water tanks for fresh and grey water.
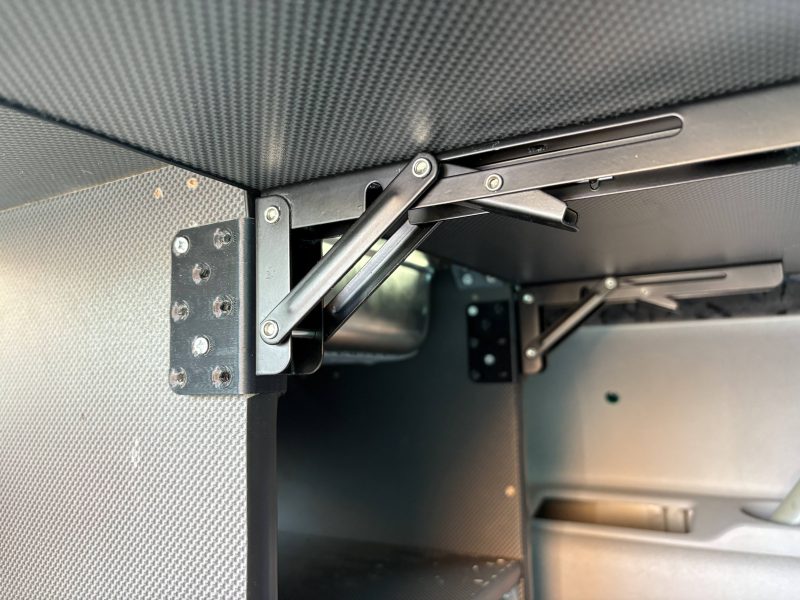
I decided to add a fold-out table made from a second panel. When folded, it sits in front of the cabinet and acts as a door, covering the shelves. I designed this 3D-printed bracket to attach the folding table hinges to the cabinet frame.
This is how the hinge bracket attaches to the cabinet.
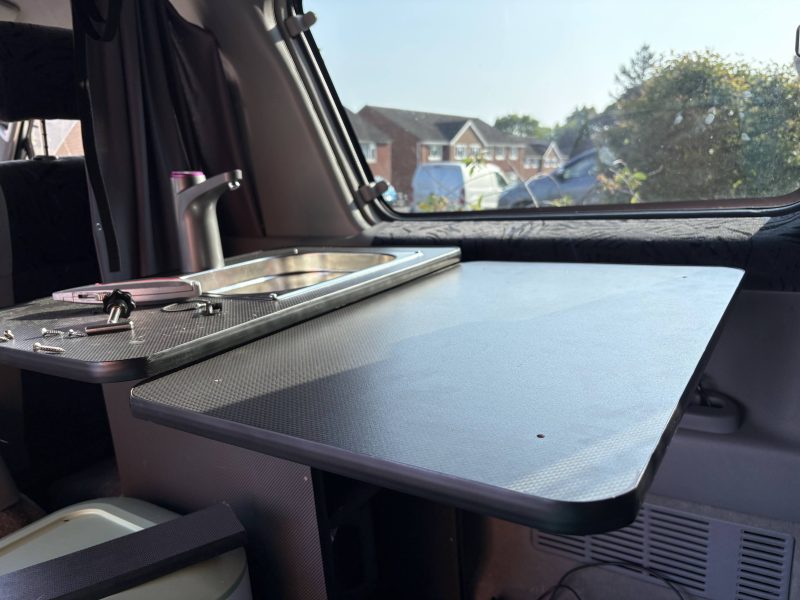
And here’s the table when extended.
This is the rear of the cabinet. The water hoses will enter the tanks from here.
And that’s the final result! The cabinet is now fully functional and in use, just as you see in the video. I drilled two holes in the bottom shelf to attach it to the seat rails using T-bolts. That means it can be removed in 2–3 minutes for outdoor use or to create more cargo space inside the van.
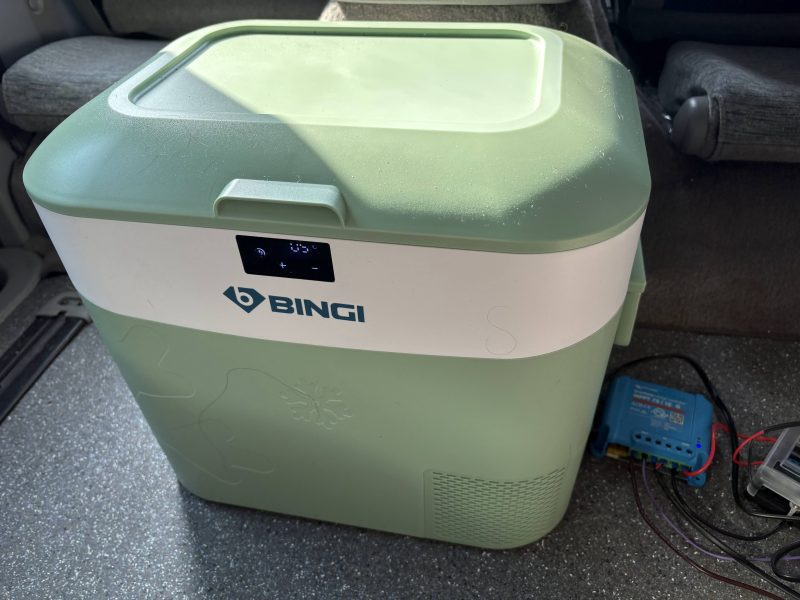
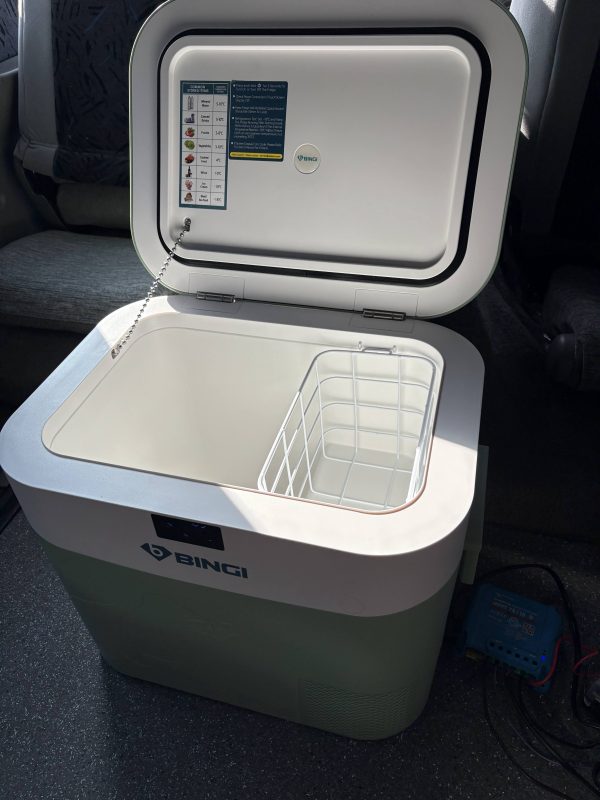
Lastly, here’s a quick word about our fridge. BINGI 18L – I highly recommend this compact top-opening fridge for any campervan where space and energy efficiency matter. It’s affordable, uses space efficiently, and can even fit a wine bottle standing up 🙂
Its compressor is impressively efficient. On a hot summer day when the van interior reached 35°C, it consumed an average of 220Wh per day. In full use by four people, it peaked at 260Wh daily. With a pair of 135W solar panels in series, the Victron charger fully replenishes overnight consumption by around 8 AM the next morning, switching to float mode.
Update – 2 August 2025: Still working flawlessly, and we’re genuinely happy with it. Especially helpful after supermarket trips — you can keep food chilled, or even switch to -18°C deep-freeze mode when needed. Strongly recommended.
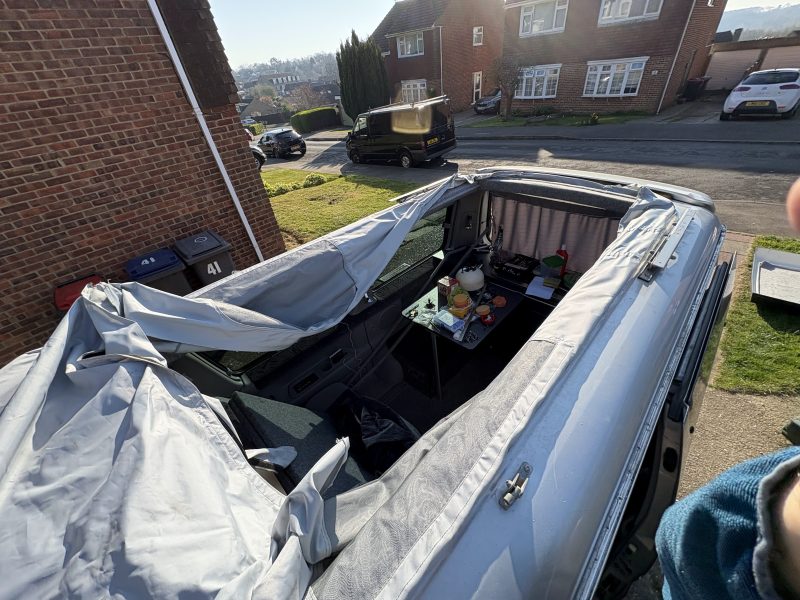
This is the original rear kitchen layout the van had when we bought it. As you can see, when the tailgate is open, you can access most compartments — but the hob and sink have glass covers that open inwards, meaning they’re only usable from inside. Also, the worktop is far too high to use comfortably from outside.
I removed the kitchen unit and flooring to give myself a blank canvas to begin the conversion.
The previous setup had the passenger bench seat mounted rear-facing, and the seat rails had been cut. Luckily, a member of the Mazda Bongo Facebook group had a set of original full-length seat rails and sent them to me — they arrived within a few days. I cleaned off the rust, applied wax spray for protection, and reinstalled them.
Now we have a sliding passenger seat that can move from the back to the front of the van, and a solid rail system to build on.
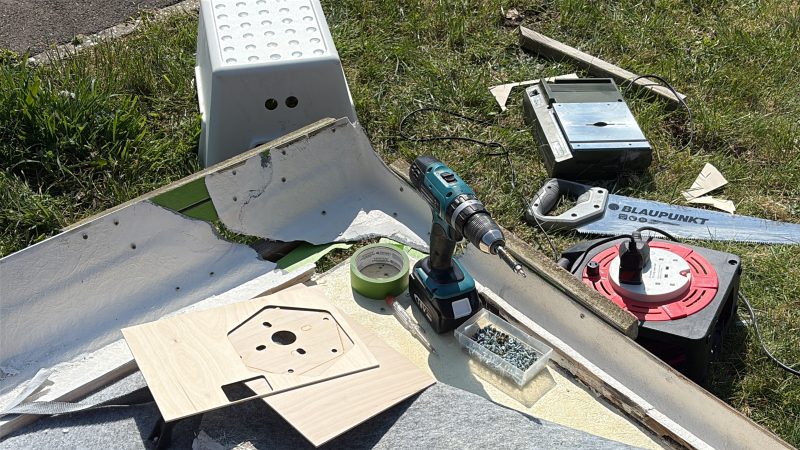
I’m designing the smallest possible functional kitchen using the 15 mm lightweight caravan plywood reclaimed from the original unit. This photo shows one of my early mock-ups.
Here’s what I’m aiming for:
The kitchen will be 40 cm deep and sit directly behind the driver’s seat.
It will be secured to the seat rails using hand-tightened T-bolts, allowing easy removal — great for outdoor cooking or transporting large items.
It will have 10-litre clean and grey water tanks.
It will include a sink and tap.
There will be space for a gas cartridge camping stove.
The hob can also be used indoors on a table when needed.
A fridge will be included.
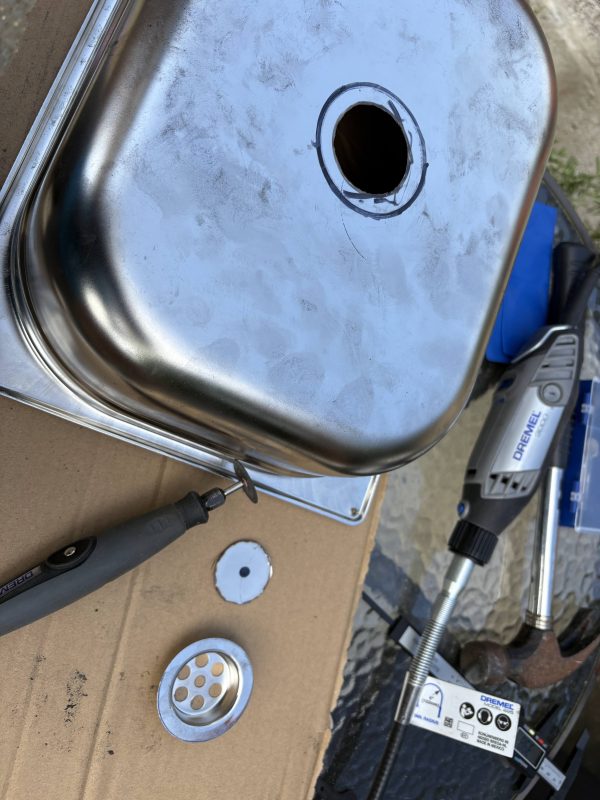
For the sink, I decided to use a stainless steel 1/2 Gastronorm tray, 100 mm deep. These are common in commercial kitchens — cheap, sturdy, and easy to find. Only £10! Here’s the link: https://amzn.eu/d/2ja2MXG
Cutting and drilling stainless steel can be a pain — most standard bits overheat quickly, and hole saws for sinks are pricey. I tried using a Dremel by hand and, to my surprise, the cutting disc sliced through the steel like butter. It only took about three minutes to finish the cut.
I installed the sink drain and sealed it in with silicone.
If you’ve ever installed a stainless sink, you might wonder what these strips are. The answer’s simple: they’re vibration dampening pads. They’re standard on many sinks to stop the metal ringing like a bell every time water hits it. I quickly realised I needed the same — the sink was making loads of noise with even small splashes.
I ended up sticking a roofing repair tape underneath. It’s heavy, super sticky, and does the trick. Any dense tape or bitumen mat should do the job.
The sink is now ready! See you in Part 2 of the kitchen build.
The weather in Canterbury looked promising this week, so I took the plunge and removed the roof to begin repairs. A good friend of mine had already helped straighten the bent stainless steel roof scissor mechanism.
For the repairs, I used a 2-litre fibreglass repair kit — it came with fibreglass fabric, polyester resin, and the required hardener.
I started by grinding away the shredded 30×30 cm section at the edge of the fibreglass roof using an angle grinder. Of course, this opened up even more gaps in the damaged areas. I covered the underside of the holes with masking tape and added some timber support blocks to hold the fibreglass layers in place as they cured.
The final state before repairs began.
There were seven cracked areas in total on the roof, which I patched using 4–5 layers of fibreglass each. Since each layer takes around 20 minutes to cure, I worked in a clockwise pattern around the roof — mixing small batches of resin and patching one crack at a time. This method meant I wasn’t sitting around waiting; instead, I was always working on the next area. The job was done in a single day.
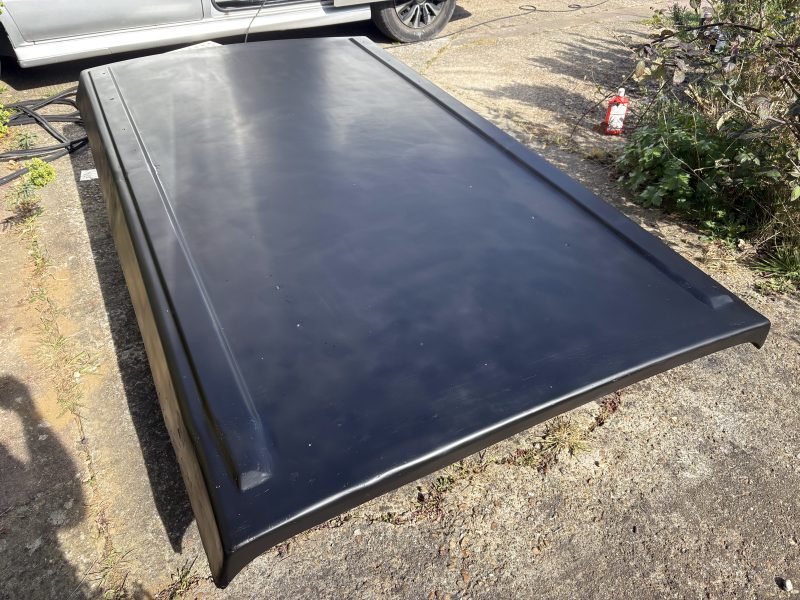
Before painting, I sanded the entire repaired surface to prepare it properly.
I finished with a coat of matte black automotive paint. It’s far from perfect, but for a DIY job, I think it’s acceptable. I’ll share a mistake I made at this stage: I didn’t properly sand and degrease the areas that weren’t damaged. Because of that, some of the paint on the previously intact surfaces started peeling off a few days later.
Lesson learned — always prepare every surface with the same care before painting.
And here’s the result! We finally have a fully sealed and sturdy pop-top roof again.
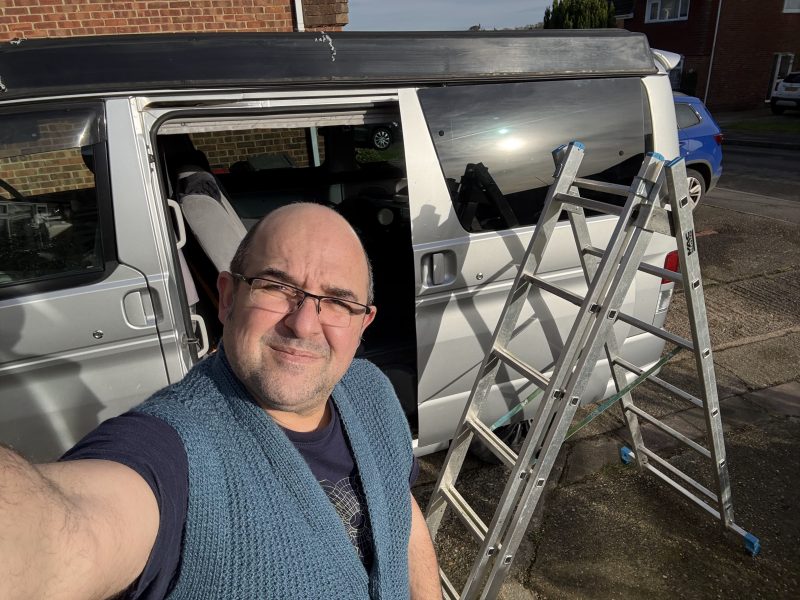
The weather finally improved enough for us to start working on our Bongo. In the meantime, I did plenty of research and gathered all the materials we might need. First task: repair the small rust patches before they get any worse over time.
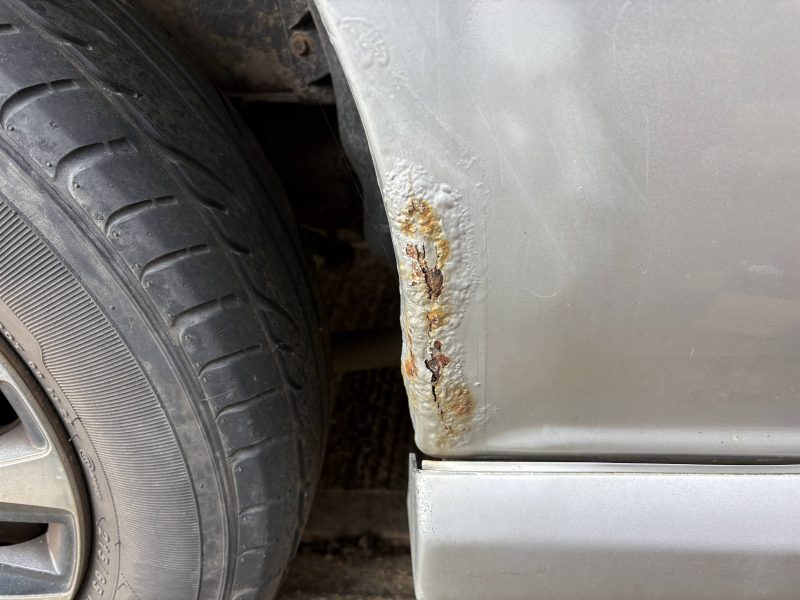
This was the largest visible paint bubble on the van — around 8–10 cm. I thought it would be a quick fix, so I started scraping the paint… and then…
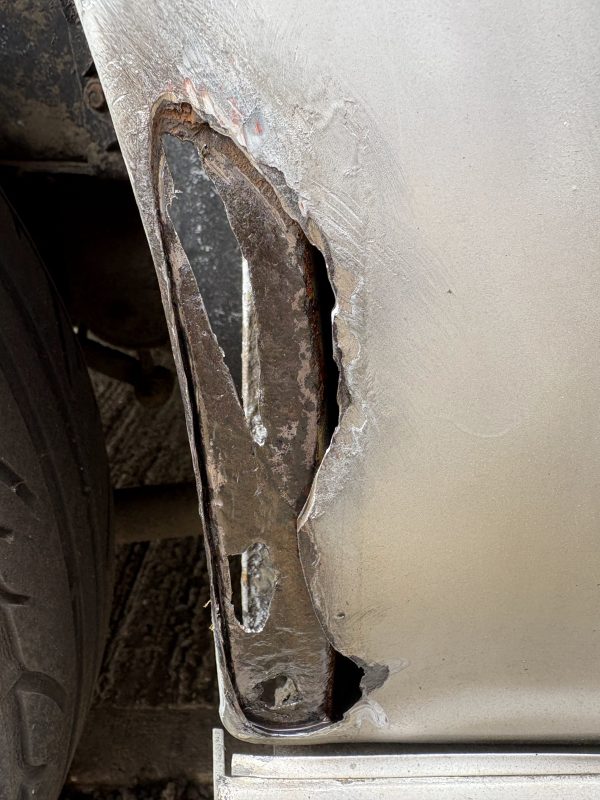
It turned out the problem wasn’t as small as I had hoped 🙂 Even tiny 1–2 mm bubbles turned into 3–4 cm holes once I scraped the paint away.
First, I reinforced the holes with aluminium mesh. This acts as a base for the filler, which is a mix of polyester resin and fibreglass strands.
Once the coarse filler dried, I sanded it and applied a finer layer.
This is what it looked like after sanding — ready for paint. I know it’s not a perfect finish, but this is my first time trying something like this. I expect I’ll have to do it again at some point, so I’m deliberately avoiding wasting time chasing flawless results. As someone once said (I wish I remembered who): “Give me your third-best — the second-best takes too long, and perfection takes forever.”
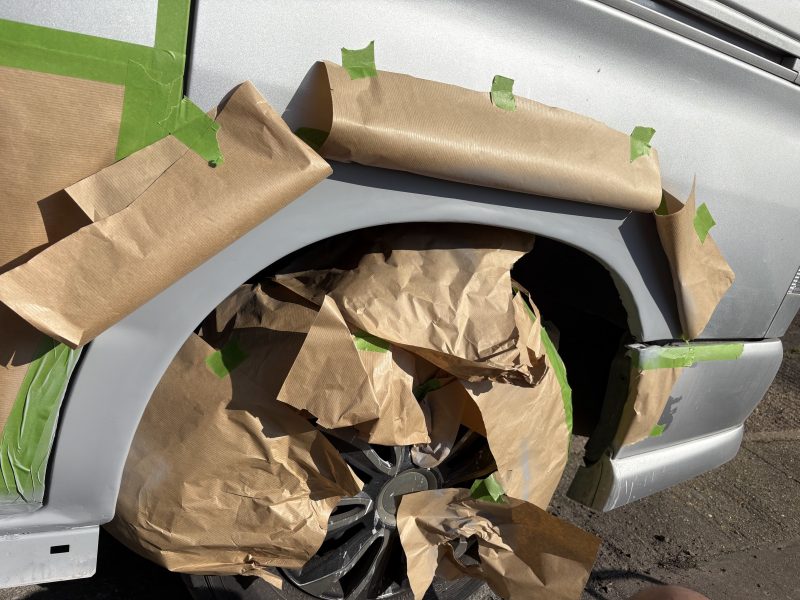
To avoid creating harsh edges when spraying paint and lacquer, I used a trick I saw on YouTube. Curling the edge of the masking paper gives a much softer transition for the spray.
I used spray bottles matched to the van’s original paint code, followed by clear coat. The result is shown above. Unfortunately, even though the colour code matches, the metallic particles in spray paint don’t align the same way they do in the factory — which a friend warned me about. For a proper metallic finish, you really need to paint the entire panel, which is beyond my skill level (and not possible with rattle cans). That said, the mismatch is barely noticeable unless you’re in direct sunlight.
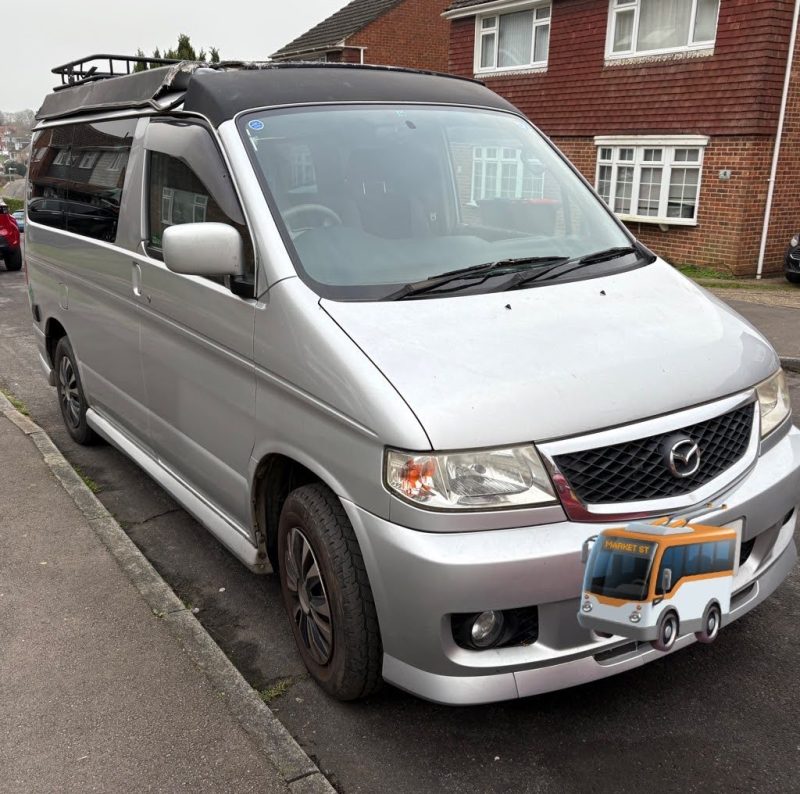
It’s a 2002 model with 171,000 km on the clock. Unfortunately, it came with a significant history: the previous owner tried to drive it out of a height-restricted car park with the fibreglass pop-top open. As a result, the third-party roof was badly damaged — a 30×30 cm piece is completely missing from one corner, the metal scissor mechanism is bent, and there are structural cracks in at least seven different places, some of them spanning the full width of the roof.
Surprisingly, the awning survived intact. The mosquito nets, however, are torn in several places, though nothing too serious.
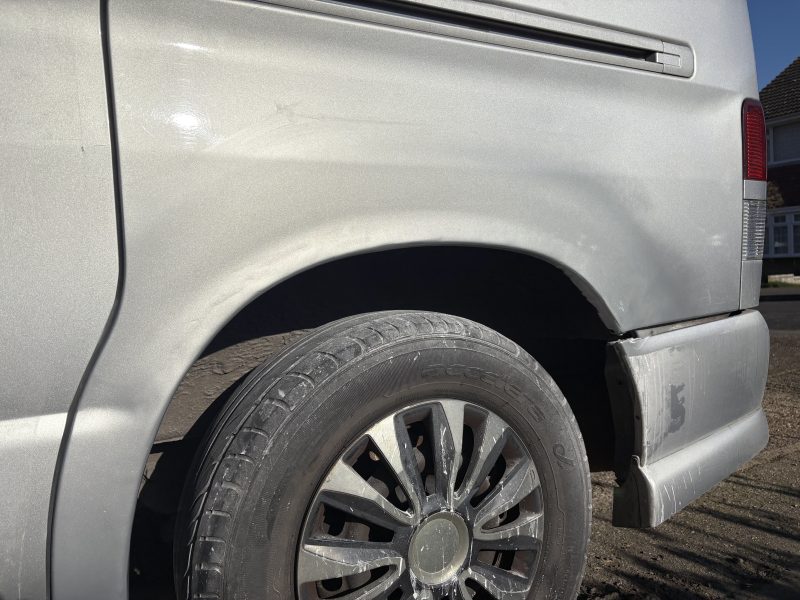
The engine struggles to maintain idle due to a faulty MAF (Mass Air Flow) sensor, but overall, the van is in remarkably clean condition. There’s barely any rust on the engine or chassis, and only two visible patches of bubbling paint around the wheel arches.
The Rear Kitchen Layout – Not Quite Right for Us
After being imported into the UK, the van was converted with a rear kitchen layout and a pop-top roof. Inside, there are bench seats built over the rear wheel arches and a rear-facing passenger bench just behind the front seats. The setup feels more like a travelling café than a campervan. With two children, we quickly realised that it’s not suitable for our family. There’s barely any storage space left, and the kids have to travel backwards.
Reading forum posts confirmed our experience: large kitchens and fixed seating arrangements in such compact vehicles often turn out to be impractical during hot summer days. Many owners report never actually using their built-in hobs. Moving the hob outside and repurposing the interior kitchen space for storage seems to be a smarter choice — and that’s what we’re planning to do.
A Bargain Buy?
We paid just £2,000 for the van, with only 20 days remaining on its MOT. So while it needs a fair bit of work, it’s a solid base — and we’re excited to start making it our own.